This page details how to use the scheduling features within Fresh Schedules.
1. The Calendar
3. Switching Views
There are many ways to view the calendar. Find the one that's best for you by clicking the dropdown link in the top left of the Calendar.
Employees have the choice of month, week, or day view. Managers can use the horizontal views that display schedules grouped by employee.
4. Filtering
When there's a lot of schedules, it can be tough to find what you're looking for. Filters make that easier.
Click 'Filter' in the top left of the calendar. You can filter based on employee, schedule type, posted/unposted, or the progress of a shift swap.
5. More Information
To view more information about a schedule, click it on the calendar. From there, you can click 'More Information' to visit a page dedicated to that shift.
6. Timeline
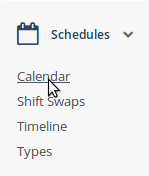
Visit the timeline from selecting 'Timeline' from the Schedules dropdown in the left sidebar. The timeline lists schedules in order of recency. Scroll down the page to view further back in time.
It offers the same features as the calendar, but presents the information in a more mobile-friendly way.
7. Creating Schedules
To create a schedule, visit the calendar and click a day. The new schedule form will appear.
Select the employee, job, clockin and out times, then click 'Save Schedule'.
8. Dragging/Dropping Schedules
You can drag, drop, and resize schedules to extend hours or change times.
9. Updating Schedules
As an alternative to dragging/dropping, you can click the schedule and click 'Edit'. This will present a form where you can modify the schedule. Click 'Save Schedule' to finalize your changes.
10. Deleting Schedules
Only unposted schedules can be deleted. To delete a schedule, click it, then click 'Edit'. You'll see a trash can icon. Click it to remove the schedule.
11. Posting Schedules
Employees won't be able to see the shifts you've created until you post them. To post schedules, click the gear icon in the top right of the calendar. A menu will drop down.
Select 'Post Schedules' to open the dialog. Choose a start and end date. All schedules within the date range will be posted. You can also choose a schedule type to only post those schedules.
Click the 'Post' button to post the schedules.
12. The Swap Process
An employee has the capability to give their shift to another employee. This is called a "swap".
The flow of events for a swap is as follows:
- An employee requests a swap.
- A manager approves/denies the request to allow the employee to begin the swap process. (Optional)
- The shift becomes available for pickup.
- An employee picks up the shift.
- A manager approves/denies the pickup.
Until someone picks up the shift and that pickup is approved by a manager, the originally assigned employee is still responsible for the shift. The employee who picked up the shift becomes responsible for the shift as soon as the pickup is approved.
Managers determine whether step 2 is enforced in their store location. See Settings.
13. Request a Swap
You can request a schedule swap in Fresh Schedules at the Calendar page. Simply click a shift to see the popover of detailed information about the shift.
At the bottom of the popover, there is a link labeled "Request a Swap". When you click this link, you will see the color of your shift change, confirming that you have requested a swap for your shift.
Some Locations require an employee to have managerial approval to create the swap, before the shift becomes available for coworkers to pickup.
You can view the status of your swap by going to the calendar and clicking on your shift.
14. Available Shifts
After a swap is requested, it will either become available right away, or, depending on store settings, will await approval to become available.
Once a shift becomes available for pickup, it will be listed under the 'Available Shifts' tab. At this time, employees qualified for that job will have the opportunity to pickup the shift by clicking the 'Pickup' button.
After picking up a shift, a manager will need to approve the swap. Until that happens, the originally assigned employee is still responsible for the shift.
15. Approve/Deny a Swap
To approve or deny a swap, go to the 'Swaps' page, which can be found in the Schedules dropdown in the left sidebar.
There are two swap phases that require managerial approval: drop approval and pickup approval. Drop approval means an employee has requested a swap and approval will be required before that shift becomes available for pickup. Drop approval can be skipped by editing store settings. Pickup approval is when another employee has picked up the shift. Until a swap is given pickup approval, the originally assigned employee will still be responsible for the shift.
You will see a tab for each type of approval. To approve or deny the request, click the 'Approve' or 'Deny' buttons.
